STAMPING SUPPLIES FOR SALE

Wednesday, May 28, 2008

Sister Tidbits...

Just a little update on my twin sister! In case your wondering why she's sportin' the Sinead O' Connor cut, you can catch up on the THIS POST HERE!

My sister is doing incredibly well and is extremely grateful for her outcome. She will have to see a neurosurgeon for the rest of her life to make sure her tumor does not come back. Remember this is something she may have had for 3 years without ever knowing...the tumor just esentially ran out of room to grow and that is when she finally started having symptoms(severe headaches, and numbness on her left side). All along she thought she might just be having recurring migraines. Don't be afraid to ask your Dr. about any symptoms you may be having! My sister is very lucky that she never had any seizures due to the size of this tumor(we saw the actual tumor in photos!) or any other lingering issues. She truly is a miracle...I think its just because she's more stubborn, nothing was going to get her down! This is her little boy Aidan that's getting all our smoochies! He's such a ham:)

*****This is my last post for a while! The movers are coming tomorrow and Friday and then were hitting the road. I do have some projects saved so I may post from time to time while in transit. I have already posted a project today(just scroll down!) so you can check that out. Thank you to those who have written and found inspiration thru my blog. I know I've said it many times over, but crafting truly is a passion of mine and I'm always looking for something new to try. Until then...

For Baby Kate....

A fun little gift ensemble I put together for my gf who is due with a baby girl. I chose the pink and black to match with Kate's nursery colors!
Another fancy chocolate nugget box. I really like the cursive font "baby" on the nugget labels. You could also use the SU! Alpha Dots which fit perfectly in the little circle!
Another simple baby bag tag...this one is by far my favorite that I've made. Not only do I love the simplicity, but also love how the scalloped nesty die coordinates so well together. I added a little bling with some rhinestones from Micheal's(jewelery department). I didn't make any extra holes for the ribbon to go thru, just used the holes that already existed.
I made 5 thank-you cards to add to the bucket. There was also a little room left in the back of the bucket so I made a set of brup cloths to go with it!

Tuesday, May 27, 2008

Mingmei Munchie's Winners...

Alrighty ladies!!! Lots of good guesses...I'm sure Mom wouldn't be to happy to have us 40 mins. apart though...lol I was really surprised that one of you is dead on with BOTH answers:) Here are the winners:

Elizabeth-I'm turning 28 this Sunday:)

CCORBITT- My twinkie and I are 10 mins. apart:)----Please send me your email address!

I'd like to share my sister is doing very well! She is still on anti-serzure medication for after effects, but has since returned back to work as well. I will get up my last post later this afternoon and put a sweet picture up of her:)

Thanks so much for your kind words and playing along!
Dawn:)

Friday, May 23, 2008

Mingmei Munchies!!!!!!


Ok ladies...I've got a few BIG things to celebrate so its time to share some of my favorite goodies with you! First, we've got a BIG move coming up next week...we're moving from NYC to NC and we couldn't be more excited. For those of you who don't know, my husband is AD Marine Corps and our 3 years are up so its time to move...again! This will be move #6 for us...the more you move, the easier it gets I suppose, although its tough leaving my close gf's.

Second, this young whipper snapper has a birthday coming up on the 1st...soo, this is where the catch is(what?? you didn't think I was TOTALLY going to give away these goodies for free did ya??...lol):

1. You will have to guess HOW many minutes apart my twin sister and I are...(hint: longer than 1 minute and less than 60 minutes!)

2. How old this whipper snapper is going to be...(be nice, I haven't even started "UP" the hill yet...)


Answer both questions, you DO NOT have to get both correct...if no one gets either number on the exact, I will choose winners closest to my age and birth time:) There are 2 PRIZES up for grab and they include:

1. Wooden tray
2. 5 ID badges
3. 1 Medium clipboard
4. 1 mini-clipboard
5. 1 post-it pad

I will draw 2 winners on Tuesday Morning! When you comment, please leave someway to contact you, either email or thru your webpage address. GOOD LUCK!

Thursday, May 22, 2008

Post-it note tutorial...

ETA: The mini-clipboards I'm using are made by "Nicole Crafts". I know A.C. Moore carries this brand, however I've not been able to find the clipboards anywhere, except my Local Craft Store(Lady Jane Crafts) here in Brooklyn. Sooo, heres the deal...tune in tomorrow for some Blog Goodies!
I've had several requests on how to make the post-it note holders, so here is a quick tutorial! I have seen these done a number of ways, but this is the very simple method I use. I've made so many of these, I usually just eye-ball it, but here are the exact measurements if you'd like to give it a try. Click on any of the photos to enlarge them!STEP 1: Cut your cardstock down to 3 3/8" wide by 6 3/4" long. Once cut, score @ 3 2/16" & 3 5/8.
Step 2: place 2 strips of sticky tape down for your post-it note to hold. Be sure to use a pretty sturdy tape!
Step 3: Your basic steps are all done! Now, depending on how you want to present your booklet, is how you will tape down the post-it note. Here, I wanted my book to open from the bottom...if you want to open the book from left to right, just make sure your post-it notes are taped where you can thumb on the bottom(make sense??).
Step 4: Don't worry about the top being lifted up here. Once you get your embellishments on the flap will lay flat.
Step 5: Here is your completed post-it notebook! This particular one is attached to my clipboard, but you get the general idea:) I used my Nestibility dies to creat the rectangle as well as the ovals...just cut, tape, and voila! For more post-it notebook ideas, you can click HERE, HERE, & HERE!

Wednesday, May 21, 2008

More Fun Hair Bow Holders...

My gf wanted a few of these put together, but wanted an alternative for older girls. The princess is geared more towards the younger girls so I thought just the name and maybe an accent would work best. I came up with the idea to add the large Prima's and the Making Memories Pearl Brad(these are my new fav's). I used up the last of my Making Memories paper as well...and boy did this paper go far! These are very easy to put together...you can check out his post HERE for additional information.

Monday, May 19, 2008

Happy Trails....

It must be PCS(military move) season!!! I spent most of last week getting things separated for our move next week! I'm more than thrilled to be moving from NYC after 3 very long years! I know my kiddos will be much more happy to learn that grass really does exist...lol! Anyhoo, besides packing and tossing last week, I also needed to put a few nice things together for Gracie's teachers. She has two incredibly nice and sweet teachers at her pre-school and this is my way of saying thank you for nuturing my baby! I also wanted to take a little something for her classmates...she really LOOOVES to bake and knows exactly where to retrieve her apron from.
I made some more mini-clipboards with post-it notes, a sweet little chocolate box, and of course some anti-bacterial handwash...lots of dirty hands thru out the day...lol The final touch was to wrap up the boxes in cellophane and tie on the ribbon! Cellophane does not always photograph well, so I left that one out.
I used my Papertrey Labels and monogramms for the chocolate nuggets...I don't usually make these nuggets boxes this fancy, but considering my appreication for Gracie's teachers, its certainly worth it!
I put together this little bucket of chocolates(Michelle Wooderson's) for the rest of the pre-school staff. When your making in bulk like this, keep it simple:) I have a few more projects to share this week...these may be my last postings until we get settled again! I was going to try and make up several cards etc. so I'd have something to post even after my supplies are packed away, but we are very anxious about this move and its got me soooo excited, I can't really concentrate too well on my crafting...lol We are also in the process of purchasing a home at our next duty station...so it could be approx. 8-12 weeks before I'm back to regular blogging! Those of you who know us, know this is a BIG happy time for us:) I may pop in from time 2 time, but no promises...lol

Monday, May 12, 2008

Glue-Art & Paper Studio...DT Project


For this design team project...I decided to go "out-on-a-whim" and this is what I came up with! Once I had the paper down and the collar situated, it started to remind me of the show Laverne & Shirley(see my monogram??....teehee!)...yes this is before my time, but I remember watching re-runs of this show and Happy Days because this is what Mom always watched. The necklace holder comes completely naked(bare wood) and is nice and smooth so your ready to decorate as soon as it arrives at your door! The patterend paper is from Basic Grey-Two Scoops and the white cs is a textured Bazzill. To create the collar sleeves I used my largest Nesty Circle Dies and cut them in half. The scallops are cut out in SU! Bashful Blue. I decided to for-go the regular belt line and used some prima's and adhesive Rhinestones. The great thing about this necklace holder is that it will actually hold several at one time...I just didn't put more than one on here...it would have looked like Mr. T and L&S had crossed paths...lol

For a list of Glue-Art & Paper Studio products: CLICK HERE

Design TEAM ideas:
Jen
Susie
Suzy
Kris

Retailers: CLICK HERE

Saturday, May 10, 2008

Little Boys Bag Tag...

Sooo with all those princess hair bow holders I made, I didn't want to leave one special little boy out! I made this for Maxson to coincide with his sisters bow holders. I really like my Lizzie Anne-Once upon a time set because you can use it for both sexes. This ID badge tag is fairly simple and clean. I used my prismacolor pencils and gamsol...these really blend the colors nice and smooth! I cut out the dragon for a 3-D effect and "grounded" him on top of the small oval. The oval was made by using my small SU! oval punch, once cut out, I laid the oval over the spot I wanted it to be, and simply sponged on the ink. My Karen Foster Snap Stamps were used for his name. Lastly, to hold it all together, I added some Making Memories silver brads! What fun, I can't wait until their Mommy sees these goodies:)

Thursday, May 8, 2008

Garden of Life...


You know its time to enjoy the Spring weather when you only go for your flower stamps! I can't wait to plant my own garden and have the girls pitch in. I think they will be most excited to see how things grow...my 1 year old will just be happy to be squeezing all the fruit and veggies!

Here's just a couple of cards I did using Papertrey Ink's-Garden of Life. I'm just about finished with this Making Memories paper that I purchased at Micheal's. I bought several sheets in each pattern several years ago and I did a good job of using it all up! I used several Dew Drop Chalk Inks and my SU! polka dot and paisley bg stamp. The rhinestones are adhesive backed and I found these gems at Archiver's. To mix things up a bit I turned my card sideways and I really like the symmetry...I just might have to play with some more cards in this fashion!

Tuesday, May 6, 2008

Birthday invites...

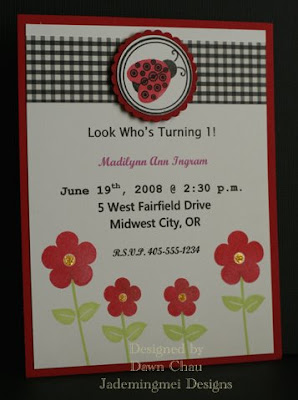
Just a sampling of the birthday invites I'm working on. These are for my gf's little girl who is turning 1. I gave her these samples to go on, and I will be making a set of the single butterfly cards. I really wanted to use my PTI sets for a natural theme and also knew that I wanted to emboss since I haven't done it in sooo long. I used all Dew Drops ink for the images and punched out the center of the flowers and added yellow stickles. I think my favorite is the second one though!

Friday, May 2, 2008

Pretty Princess Barrette Holders...

ETA: Princess Sidney has arrived for the Tea Party as well...


If your the mommy of a "princess" you know you have an array of hairbows and barrettes cluttering your bathroom as much as I do! I came up with a cute solution to display these pretty baubles and used an ID Badge(from Wal-Mart) and simply used 2 eyelets to punch on the backside to hold the ribbon. I purchased the ribbon from Joann's, in two widths, one for the smaller bows and one for the larger bows. The princess is from Lizzie Anne(Once Upon A Time), and I colored them with my prismacolors and gamsol. I made sure to get each girls hair color just right and added their names to personalize them. All you need to hang these on the wall is to use one of the 3M hooks(the kind that have the removable sticky tape that pulls down) and you can hang them right behind the bow I tied on top of the badge...easy as pie! I can't wait to pop these in the mail for my girlfriends:)