


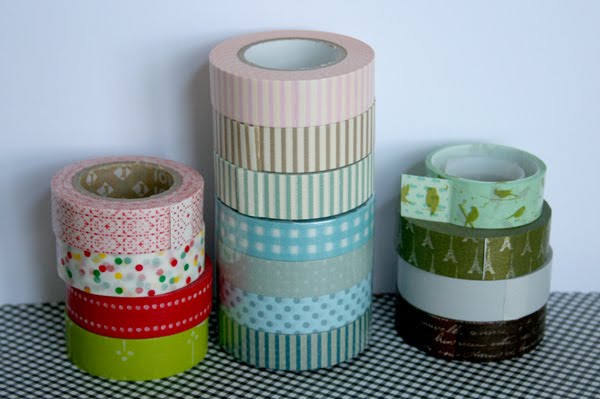
 Let's get started! I decided to make my own background pattern so I used my CM self healing mat to keep my line positions straight. The tape is not super sticky, so if you need to reposition, just don't press down hard your first try...don't ask me how I know that!
 Next, you can trim off the excess if you'd like, but I chose to simply tuck behind onto the backside of the card stock.
 I mixed two patterns for two separate cards.
 Voila! See how pretty your background comes out? I didn't want to cover up too much of the pretty tape(Washi Tape is fun to play with, but it doesn't come cheap!), so a few textured 'holly' leaves and some red Dew Drops finished my focal image.
 I was needing a little more depth and texture to my leaves so I traced around the edges with my Copper Stickles.
 On these cards I only used 1 green strip of Washi Tape(underneath the red ribbon) as an accent.
 The stamp set is Holiday Button Bits. My cards are on a smaller scale than A2, so I chose to substitute buttons with Dew Drops...sparkly!
 Next post will share some more Washi Tape designs with some yummy gingerbread! Although I've used this tape for holiday cards, I'm almost certain the tape would also make fun monogrammed cards?! ;) I just might have to play with some of those too!
 This is the new Pink Paislee pack I picked up on my last visit to VA. It's a super cute 6x6 pad and here I showed the 3 sheets I chose for this project. The great thing about 6x6 pads is that the pattern is the same as the larger sheets, but on a smaller scale...this allows you to use your favorite sheet on smaller projects!
 I made this bunch with skittles to avoid a peanut allergy with the m&m's. Still a great and sweet substitute! This was the first time I'd used skittles and they fit just as nice and snug as the m&m's.
 Added a little crystal effects for a shiny melon!
 I thought I'd add this quick note on how I made the watermelons. Just layer your circles then cut in half. When it comes to getting your 'seeds' lined up(below), stamp both corners and the middle FIRST...then go back and add your additional seeds. This will give you nicely spaced out seeds without having to guess if you do them one at a time ;).
 Lets get started! Take a sheet of 8.5 x 11 kraft cs and cut into 1 inch strips. Be sure to scor the strips at the 3 and 7.25 marks on your scor-pal.
 Stamp your polka dots only in the center with versamark ink. You can use whatever stamp you like, I'm just addicted to my polka dots! I used the medium dots from THIS PTI set...it fits perfectly between your 2 scor lines!
 Now it's assembly time! Add your cute little vday image to your strip and now your ready to band the Fun Dip packaging
 To add the band, add 2 small strips of adhesive.
 Once you add the band, it will "bunch" slightly around the cello bag...that is OK, you want a snug fit so the band does not slip off...or you can add a strip of adhesive (1 of 2 strips in the above pictures) so it attaches to the cello bag.
 If you'd like to skip the manual labor and make up some quick kits yourself, I've added a few to my Etsy Shop. The kits includes 10 bands (2 of each design), fully assembled, with 10 cello bags...all you have to do is add 2 adhesive strips, attach the band, and candy.
 The neckline looked rather plain to me so I thought I'd add a little dazzle with some ribbon and a vintage flower.
 I started by folding over the ribbon to make pleats. The ribbon is folded at about every 1 inch and pinned directly to the neckline.
 She's all pinned and ready for sewing!
 Sewing is complete! be sure to go slow with you machine as you will have the added thickness of the ribbon.
 Making the vintage flower! I used approx. 18 inches of 2 inch polka dotted grosgrain ribbon for my flower.
 Loosely gather your ribbon and sew in the middle to allow for proper gathering. This is a good spot to heat seal your ribbon edges to prevent fraying.
 Flower is complete! Don't worry about your visible threads, you will cover them later!
 To make the inner layer of your flower, you will need the largest cuttlebug die in this flower set. I folded over my material tight enough to make a "heart" shape at the top. I sewed 2 stitches to keep the flower tip from opening.
 Adhered my black flower tips on with E6000.
 Covered my threads with a vintage LARGE rhinestone.
 At this point, you can glue your pin on the back. I would've rather used a black piece of felt on the back, but I didn't have any. I'm not too worried about how the back looks like because you won't be able to see it, nor will it be going in the washer.
 How snazzy is this?!!!!
 Since I used a pin on the back of the flower, you can adjust her where you want:) You see that Amy Bulter fabric in the background?? Well, that my friends is my peg board that I decopauged because I didn't like the holes showing through! It's super easy to insert my hooks etc. You can see on the bottom where I store all my punches in my IKEA baskets/rods.
 In the end, this WAS a surprise for my oldest Daughter and I hung it in the foyer so she could see it when she came home. Well, she hates it and told me so...said we should throw it in the trash! I never expected that from her and she asked me if I could take the ribbon and flower off?!!! Needless to say, it sent her in a total tear fest and she was terribly upset that I ruined her "normal" dress! I did hang it on her doorknob yesterday in the hopes that she would wear it today. She woke up this morning and dressed her little sister...any guesses to what little sister was wearing???!!! Little stinker!

