STAMPING SUPPLIES FOR SALE

Sunday, September 25, 2011

Baby Shower Gifts...

Even though the ol' blog was empty in posts, I certainly stayed busy behind the scenes the past few months. Today's post is another special request for baby shower gifts. Since the shower was being held at The Wilmington Tea Room, I knew I had the perfect teapot set for the occasion. I hadn't realized until now, that these colors actually match my banner as well! The colors are pulled from the shower invitations and I used several different stamp sets to create my own patterned paper. First off, we started with a notebook for the mom-2-be. The notebook is for the shower gift thank-yous and maybe later she can use the extra pages to write down all the 'firsts' of baby's year before she transfers them into a baby book. Prima flowers, grosgrain chocolate ribbon, and button accent. Love the teapot notebooks! Without any intention here, I used this tag die which also looks a lot like a tea bag! Added a few 'note tabs' on the inside. A couple of notebooks for the Men who attended. I'm was really pleased with how well the cattails came out. I did not have a 'pond' themed set, so I had to make my own cattails from the SU! small slot punch. I then went back and sponged a cocoa brown ink for my first layer, then back with a darker brown for the outer shading. The pond looks more realistic with crystal effects! Love that stuff!

Saturday, September 24, 2011

Custom Frame...

Getting to play 'outside the box' today! I really enjoy getting to work on altered projects from time to time and this Alexa frame was a custom order gift I recently finished. Although it doesn't show the shimmer here, Alexa is covered in a shimmery dew drop ink, which gives a nice subtle glitter effect. The matte behind the shimmer purple is SU! Pear Pizzaz, along with the pear strip with polka dots. The bottom half repeats the same scalloped border with a strip of white grosgrain ribbon and accented with clear rhinestones.The argyle patterned paper is just a sheet of 12x12 patterned paper and has accented glitter diamonds. Once I had the frame completed, I went back and sponged the shimmer ink along the outer edges as well as the inside edge of the picture window.Happy Crafting!
Dawn ;)

Tuesday, September 20, 2011

SU! Fall Swap...

Short and sweet post today as I'm finishing up a few custom orders this morning. I recently had another SU! swap and this time the rules called for Fall colors. There aren't many SU! sets still left in my stash(once I switched over to clear), but I've kept a few old ones and now I'm finding some new ones that I really like(Wicked Cool) too! I've held on to this baroque set and decided it would work perfect with my Fall colors. The layout is a simple one-layer design and then I just added some polka dotted ribbon from May Arts.
Happy crafting!
Dawn ;)

Saturday, September 17, 2011

Batty Eyes...

Another trio of Halloween cards. I used a mix of PTI and SU! sets here to create my 'spooky' look. To create my bat squares I used the PTI-Take Three die and it cuts out 3 rounded squares at one time. Then for the yellow matte underneath, I used my CM square punch. The moon is created with my spotted dot set and the bats are from Wicked Cool again. I added some googlie eyes to 'spooky' and adhered it to a strip of black grosgrain ribbon. Super simple, but fun layout. I'm getting ready to load these up into my Etsy shop...if interested, they will be available in sets of three, one design from each of the three that were featured this week. I'm also working on getting some more candy packaging, tags, etc. in the shop, so stay tuned!

Happy Crafting!
Dawn ;)

Thursday, September 15, 2011

Pumpkin Legs...

How's that for a post title?! I love it! I pulled out my stash of Halloween papers and there was a full 12x12 sheet of cut outs and this is what came to mind...'why not put a pumpkin on legs' I thought! The only stamping I did on this card was the sentiment(Wicked Cool--SU!). I decided to add the orange rhinestones for eyes...makes me feel like this kooky pumpkin is watching me on my crafting table...LOL! Happy Crafting!
Dawn ;)

Tuesday, September 13, 2011

Spooky Surprise...

I realize it has been well over a month since my last post! With all good intentions, sometimes LIFE gets in the way. I've had a very good excuse as to not posting and that is having the wonderful joys of morning sickness! I've been terribly sick with baby #3 and if my instincts are correct, this HAS TO BE THE BOY! I don't remember feeling this ill with either of my girls. My other 2 pregnancies, although a little queasy, were nothing like this one. I'm hoping it passes soon as I've got a few projects I'd like to get going! Needless to say, the whole family is quite thrilled and my 5 year old has given me all sorts of name options, although they are all girl names! Maybe she knows something we don't? We are expecting Baby Chau's debut in April 2012.

Anyhoo, I did force myself to sit down and create some fun Halloween cards. This week on the blog I will be sharing several trio's of cards. Today's creations are done with the Wicked Cool set by SU! I must admit that I've had Really Rust CS in my paper collection and have never, I mean NEVER used it! I cracked open my SU! catty and realized they had used it along with Rich Razzleberry and Pear Pizzaz...I think I can learn to like it now! The Lattice Die(SU!) design is also a new one for me. I cut out the lattice design in Pear Pizzaz and added the Rich Razzleberry CS underneath. Every witch needs a shiny vinyl hat! The hat is popped up with foam tape and a thin layer of crystal effects was poured over the top.

Thursday, August 4, 2011

Owl Cards...

Last 'hootie' post of the week! Today I'm sharing some clean and simple cards that all you really have to do is add the owl embellishments. I decided to use the small heart punch on these owls(heart comes within the owl punch), but I'm still not convinced that the red glitter mixes well with the pastels?? Either way, I'm on an owl kick right now...don't be surprised if they spill over to next weeks posts as well! This set may not look familiar for PTI fans, but believe it or not, it's what I received in lieu of 'Say it with Style'...7 one of a kind sentiments...that look nothing like 'Say it with Style'...lol The sentiments were still perfectly usable, and 'hoo' wouldn't love to add a few rhinestones to the lettering?!! I do finally have the replacements, so hopefully I will get to play with those soon! We are off the beach today! We've got 5 nephews visiting for the week so my house is full of energy that needs to be exerted! Have a splendid weekend and happy crafting!

Tuesday, August 2, 2011

Owl Tags...

Another owl themed post! I shared in my last post owls made of simple shape punches and today's post is all about the SU! Owl Punch. What's so great about this punch is that the body, eyes, and nose are all separate dies allowing you to mix and match colors. All papers, with the exception of the patterned one(LilyBeeDesigns), are SU! This first set of tags is made with the PTI die--Tag Sale #2. The sentiments I used are from a variety of PTI's sets. I also used my trusty wood grain bg in versamark.I went ahead and made some fun mini tags as well! These fun little tags were made with Verve's--Sweet Scallop Die and coordinating stamp set. I've made up a few extra sheets of owls if you'd like to make some tags of your very own. You will get a full sheet(9 owls total) of owls to create tags, cards, or gift tags. You can find them HERE.

Sunday, July 31, 2011

It's HOOTIE Time!

ETA: Here is a fun question from Rachel...have you ever tried to make these into penguins?

Rachel, thank you for your comment and question! I have to say, I've never tried a penguin but not you've got my head spinning. I imagine if I were to try it, I'd simply change out the brown cs for black, do the bright eye background in bright orange and the rest of the eye would stay the same...voila, you've got yourself a penguin! I'm wondering though, do you think the penguin would be ok with the flower in the corner too? I'm certainly going to try this now ;)


I think I'm really starting to love 'themed' weekly posts. Having themes certainly has made it easier to blog, plus it gives me the opportunity to create oodles of fun projects while having out one stamp set or a few punches. Today I'm sharing some chocolate owl goodies that I used for a recent SU! class I hosted here at the house. This is a super easy and inexpensive gift to give, whether it be for a class or for the the kids. I've seen quite a bit of clip art with owl faces and that's where my inspiration came from to create these little guys. I wanted to use BRIGHT color behind the eyes and flowers so I just miss-matched all the colors. The eyes are punched with my CM circle punches. The nose is also a CM punch...the smallest square...and turned sideways(diamond shaped). Once I had all the eyes assembled, it still looked a little plain for me so I added the rhinestone flowers. The cello bags are 3x3 and can be found at any crafting store...these were from my sweet friend Donnak! The 3x3 size holds 4 Dove chocolate snugly. More fun filled owl posts will be up this week...cards and owl embellishments. I've made up a few extra sheets that you will be able to pick up in my Etsy shop to create your very own!

Wednesday, July 20, 2011

Dashing Through The Snow...

Yeah, it's not quite feeling like 'snow' around here today. Temps are over 100 with the heat index, but since this is our first day in HOT weather, I won't complain too much. We are not suffering here as is most of U.S. right now. NC has been hovering in the high 80's the last few weeks and it's been blissful...I knew it wouldn't last forever.

In the meantime, I've got a set of fun cards to 'cool' you down a bit. This is the first time I've used my reindeer stamp(SU!). I bought him at the end of last season so he's been sitting around, collecting dust etc. Anyhoo, I mixed my reindeer with some Papertrey Ink(ribbon tails, polka dot basics, and woodgrain) sets and SU! new cherry cobbler ink...which is super close, if not the twin, to cranberry crisp. The reindeer is gold embossed and accented with twin stars that I stuck together with a rustic copper brad. I'm off to finish the mess of owls I've created in my craft room. I got carried away last night, but have a lot to show for it ;).

Monday, July 18, 2011

Washi With A Little Ginge-y...

Today I've got a set of cards using the Washi Tape again. If you missed the tutorial on using Washi Tape, just scroll down to my previous post for some easy-to-follow tips. I used the same stamp sets, Signature Christmas and Holiday Button Bits. I loved this patterned tape and thought it felt just like a gingerbread house so I decided to cover my entire vanilla card stock. I outlined ginge-y in Copper Stickles and filled the frosting lines with Liquid Pearls(puffy paint, but better!). She looks DELISH!This card follows the exact tape layout I did in my tutorial. I left the gaps open so I could add the candy cane twine. Make sure if your using twine that you pull it taunt when taping on the backside...otherwise is stays loose and your twine will sag.Stay tuned this week for more Christmas goodies! Happy crafting!

Friday, July 15, 2011

Washi Tape Tutorial...

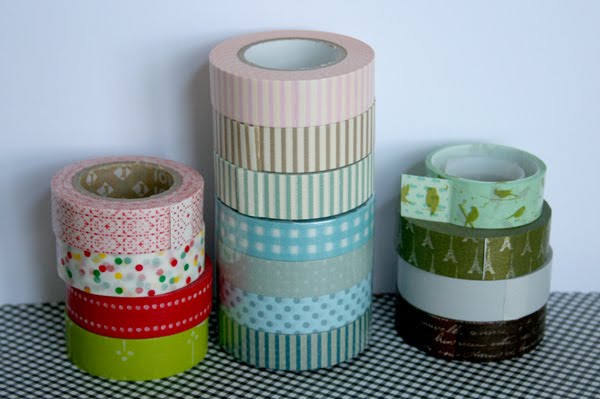
So if you've been on the FB page you know I've been drooling over this fun new product(Washi Tape) I've been experimenting with. Now, I will tell you, it really is not a new trend or fad, as a matter of fact I remember seeing this as a kid when I lived in Hawaii(some 20 years ago). In Hawaii this tape is known by Kawaii Tape. It's essentially the same thing, thin rice paper tape, but the Kawaii versions have cartoon characters like Hello Kitty etc. There are lots of places to buy Washi Tape and the collection I'm sharing with you today is from Etsy. Today's post is going to focus on the Christmas stack on the left. Let's get started! I decided to make my own background pattern so I used my CM self healing mat to keep my line positions straight. The tape is not super sticky, so if you need to reposition, just don't press down hard your first try...don't ask me how I know that!Next, you can trim off the excess if you'd like, but I chose to simply tuck behind onto the backside of the card stock.I mixed two patterns for two separate cards.Voila! See how pretty your background comes out? I didn't want to cover up too much of the pretty tape(Washi Tape is fun to play with, but it doesn't come cheap!), so a few textured 'holly' leaves and some red Dew Drops finished my focal image.I was needing a little more depth and texture to my leaves so I traced around the edges with my Copper Stickles.On these cards I only used 1 green strip of Washi Tape(underneath the red ribbon) as an accent.The stamp set is Holiday Button Bits. My cards are on a smaller scale than A2, so I chose to substitute buttons with Dew Drops...sparkly! Next post will share some more Washi Tape designs with some yummy gingerbread! Although I've used this tape for holiday cards, I'm almost certain the tape would also make fun monogrammed cards?! ;) I just might have to play with some of those too!