


 The sentiments I used are from a variety of PTI's sets. I also used my trusty wood grain bg in versamark.
 I went ahead and made some fun mini tags as well! These fun little tags were made with Verve's--Sweet Scallop Die and coordinating stamp set.
  I've made up a few extra sheets of owls if you'd like to make some tags of your very own. You will get a full sheet(9 owls total) of owls to create tags, cards, or gift tags. You can find them HERE.
 Here are some fun mini-tags using Sweet Treats and THIS coordinating die/stamp from Verve. I wanted a little more dimension, so I used my woodgrain bg stamp in versamark. The flowers were all die cut with leftover paper I had stamped for a previous project. The red flower is cut from felt.
 I recycled more of the hearts I used on my glitter heart string for Vday.
 Using my SU! flower trio punch, I created some fun, 3-D flowers. The rhinestone centers are a sage green.
 I did a 2-for-1 here and created cards and tags! I really love these phrases from the Verve stamp collections. There are several sentiment sets they sell, and they are nice to use in place of regular images I would normally color.
 I wanted to keep all these projects on one post since I used the same stamp sets...you get a visual of how many different projects you can create! All stamps are PTI and cs is from SU!
 The little feet are from the Loss of a Child set and I pulled the double layer circle from the Borders & Corners set.
 The pleated pink skirting is made from crate paper! Yes, the same streamers you use to decorate for the kids birthdays?! I was so excited to play with this. It is thin, very thin, but as long as you don't tug too tight with your adhesive, you get a really fun look to your projects and you don't have to worry about the extra bulk for postage!

 I was on a roll here...so I kept going and made up a stash of tags!


 WHEW! That's a long post! The next few days will be super busy getting my table finalized and last minute things I need to grab for the craft show. I'm almost...not even close really...to being ready! Happy crafting my friends ;)
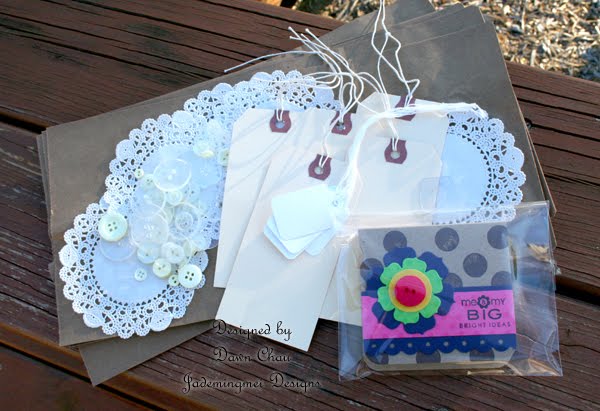 Kit includes: 5 kraft lunch sacks, 5 white doilies, 5 large manila tags, 5 white sentiment tags, handful of clear and vintage cream buttons, and post-it pad.
 All my tags were made with PTI's-Egg Hunt. On this first set of tags, I used my Beautiful Blooms II flower die. The flower petals are double layered and curled up with a pencil edge. After I had the flower curled, I used 3-D foam tape to lift the layers up. The pink circle matte is cut with my CM circle cutter.
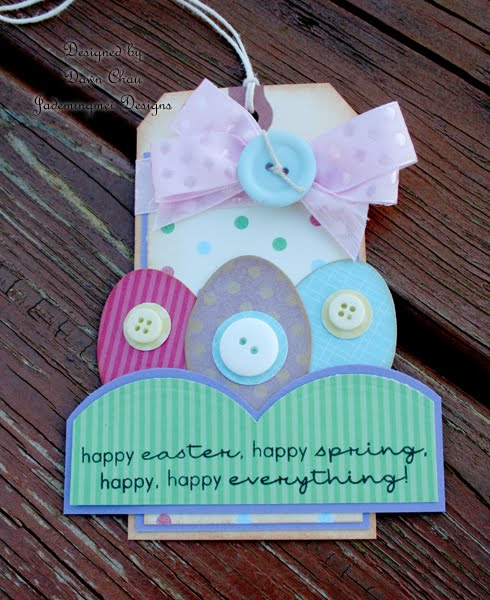 Ready for an egg hunt? The purple egg is die cut and stamped with one of the 3 egg patterns that come with the set. The other two eggs are simply die cut from patterned paper. I had cut the green paper portion before I realized just how long my sentiment would be. After a little figgiting, I decided it looked kind of cool hanging off the sides of the tag.
 Same design as above...just changed out the grass pattern and added a ghost shape butterfly (double layer). I used E6000 to adhere the butterflies down and it dries clear so they look as though they are floating.
 A little doily fun! This is actually one doily for 2 tags. The ink I used is a sparkly dew drop green and it really helped the eggs POP! The ribbon is probably some of the oldest ribbon I've owned (I'm guessing 10 years...give or take!)...I knew if I held on to it, I'd find SOMETHING to use it on...YOU know what I'm talking about, right? Perfect example of use what you have and not hoard ;)


