STAMPING SUPPLIES FOR SALE

Tuesday, April 28, 2009

Playing catch-up!

I'm back with some more goodies to share. April has been an incredibly busy month with fundraising and donating items for Relay for Life. I'm proud to say for someone who had never heard of this program before, I walked away this weekend with a new sense of appreciation and admiration for those battling and those who have survived cancer. It touched my life in more ways then I could ever explain. I met a young lady who happened to be working the luminary booth with me and we got to talking (found out later that our hubby's work together!) about the event and she told me of her cancer diagnosis of ovarian cancer at only 17. Now, I don't know about you folks, but this is what gets me very agitated about insurance companies designating a certain age in which to receive certain preventative treatments such as a mammogram etc. I'm hoping the health care industry (yes, it IS a business, unfortunately!!) will reverse their practices...its much more cost effective to run a cancer detecting machine than having to deal with the consequences down the road (chemo, surgery, etc.). Cancer does not have an age....


Now, on to the fun stuff that has been sitting in a file on my desktop...lol I had made this Easter Basket for the last auction. Usually, I only have gift card donations, but this time I had some cash donations that needed to be disguised. Any guesses where I put the cash???? That's right! I broke out the power tools for this project and drilled holes on the underside of the eggs and inserted the wood dowels. The hole drilled is slightly smaller than the diameter of the dowel so I would have a nice and snug fit. Yes, my desk really does look like that...I just noticed how messy it was! I assure you it is just as messy now as it was a month ago when I made this basket! I'm not ashamed, it's always a work-in-progress...lol I used my favorite Verve Set-Petals & Stems. The die-cuts in the background are from my Nesty Dies and I ran them thru my Wizard. I added some purple satin ribbon from Wal-Mart and dabbed on some heavy duty glue for my Foo-fa-la button.I'm not too sure about this notebook, but I threw it up here anyway. There are a number of things I would change (cut the sentiment smaller, spaced out my scallops evenly) on it, but for my first time using this image, it's "ok"....lol I really like this fruit paper though. The images just need to be smaller so I don't cover so many of them up...there are several cherries hiding underneath the stamped image...lolI took this close up for the sentiment...we all have "those" days on occasion! I'm working on a "Behind the Scenes" this week...hopefully I can have it edited and uploaded by the end of the week. Hope your week is off to a great start!

Wednesday, April 22, 2009

Hello Kitty Fun...

Michelle said...
SOO CUTE!!! You (almost) make me want to have a baby so you can make me some..heehee.. WHat font are you using in those invites???


Haha, you funny Mish...you may want to talk to Sam about the baby issue, and don't tell him I gave you any ideas!!!! The fonts I used on the invites (previous post) are just the generic ones on Microsoft Word. They are a combination between Comic Sans MS and Script MT Bold. I have tried over and over again to upload some new fonts online, but I have no clue where they save to, and it gets old asking hubby to find them for me...lol


Joan B said...
These are gorgeous!!!! BTW, I hate to say this but the Gina K paper is even better for Copics!!!

Thanks Joan, I haven't tried her paper before! I really do like my Papertrey only because I don't want to buy yet another brand...I already use 3 whites in different brands...it's kind of like buying 3 different brands of ink...which I also do...but then again, there is different paper and ink for different projects right?


My oldest Daughter had a few birthdays come up for her friends and I really wanted to stay away from buying toys. Anyone who is a parent knows the "losing battle" when it comes to keeping rooms clean and tidy...hard to do when there are thousands of toys, especially those with itty bitty pieces. When it comes to making something for little girls, I only had to reach for my Hello Kitty paper. I remember when I was younger I LOOOVED her and also loved the Sanrio Shop at the Pearl Ridge Mall in Hawaii. During 6th grade recess all my girlfriends and I would trade erasers from our cute little locked boxes! It brought back a lot of memories when I picked up these 12 x 12 Hello Kitty Sheets at Archiver's in GA. I will definitely have to pick up more on my trip there in May!
I had originally made up this purse to coincide with the large notebook, but actually put it together with the smaller monogrammed "A" notebook below. The larger notebook is going to be used in an auction with Relay for Life this coming Weekend. I punched the kitties out with my CM circle punch and then matted them with coordinating colors. To add a little flair to my paper purse, I added a Heidi Swapp Ghost Flower (I didn't want to cover my image so the clear flower allows you to see the Kitty without blocking!) and some Prima's.
A is for Alyssa! I used a mini-composition notebook here and covered it with a hot pink and black color combo. The scalloped neon green is done with my SU! scallop punch and added some pink rhinestones on the spine.
A simple little chocolate box! I didn't get the pics snapped of the inside, but it held 6 chocolates that spelled out Alyssa! She just turned 6 and was super excited about this gift! M is for Mia! This is the perfect size notebook for travel. I kept it simple because she will in fact be traveling back to KY with her parents as they are doing yet another military move! Mia will have plenty of time to doodle and pass them time in her new "M" notebook. I used my new MFT Bling Bet and filled in the spots on the "M" with some pink rhinestones. I also added a few extra rhinestones on the middle of the flowers. Be careful when you pull these stamps off the backing. The "a" and the "f" on my set were actually fused together so when I went to pull of the "a" it split down the middle:(
Well gals, that's it for now! I've been super busy volunteering with Relay for Life...explains the lack in posting...and it finally kicks off this Friday and Saturday!!! If I don't manage to squeeze in another post for this week, I will certainly be back to regular posting starting next week! I do have lots of things to share, just need my "go-go-gadget" arms, or a clone...something! I hope you have a wonderful week!


Tuesday, April 14, 2009

BIG THANK YOU & Some Fun Invites...

Susan (susiestampalot) said...
hey dawn, this is super adorable! what a cute idea! copic coloring ink---Palette Noir from Superior (papertrey sells it) or Brilliance Graphite Black from Tsukineko. and yes--just say no to the glossy paper!! again i'll send you to papertrey for their white cardstock--NONE better and perfect for copics. it's all i use! i hope this helps and i hope you don't think it too presumptuous of me to give you such a strong opinion. it's just what works for me!!! hugs, sus


Susie---Thank you so much for helping me out with this issue! You are the best:) I do have the PTI cardstock on hand, which I use quite often, just was using the wrong CS for copic coloring. I was totally going to buy the Palette Noir from PTI as well, but there was no refills in stock, so I opted for the True Black they sell...which totally did not work well at all...it smeared really bad. Soooo, back to ordering the Palette Noir to give it a try! Again, thanks for taking the time and helping me out...you ROCK!


Flipfloppingmamma said...
Where did you get the paper for these? Especially the strawberry one...LOVE IT!


Flip (I totally should ask her "real" name eh?)--is referring to the paper I used in THIS post with the post-it pads. The strawberry paper is from the Sonoma-Scenic Route line which I purchased at Archiver's in GA, but I'm sure any of their stores will carry it. The other papers I used in that post were older papers I just had in my stash and needed to use up.


Aside from the fundraising work I've been doing, I've also been busy doing a few things for some close friends and I thought I'd share them with you all. Invitations are probably one of my favorite (besides altering things!) crafting projects to work on. I especially enjoy doing baby announcements...kind of like getting my baby fix, but without the kid "actually" being here...lol There are several different orders I was working on, but figured I'd just throw all the invite samples on one post! Using my PTI-Garden of Life set I decided to add some depth to the flowers by stamping a separate rose in the center and used pop dots for a 3-D effect. I also added some crystal stickles for sparkle.
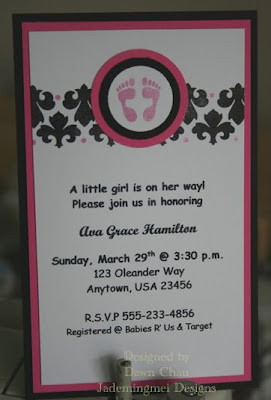
Now she's a beauty if I may say so myself! Its been a while since I've inked up my Bella Stamps and I remembered having this one in my stash. I colored her with my copic markers and to "ground" the image I simply added a little cool grey color on the bottom..Because I couldn't seem to use just ONE set on this design, I combined several of my PTI sets. The sets include: Damask Designs, Polka Dot Basics (the smallest dot in the set), With Sympathy-Loss of a Child (the little pair of feet). I really like the color combo here as well! Some more PTI (yes, I love their stamps!) goodness!
This is the Verve Set I can't seem to put down. I've been using the butterfly in this set A LOT, but decided to use the flower for a change!
There are lots of little girls being born around me and I think I might just copy one of these designs to use for my new niece who is set to arrive in July! I will go ahead and make these up for my Sister and make sure the envelopes are pre-stamped with postage...she knows I'm good like that and it's one less thing she'll have to tend to after bringing Katelyn home!


Thursday, April 2, 2009

A Little Inside Joke...

I love these mailboxes from the Target $ Spot. I'm always looking for a new way to "spice" them up! I put this mailbox together for a girlfriend as an "inside joke"...she is a little stressed so the stamp set and contents inside fit well together! I used My Favorite Things-Serenity Now set. I colored her up with my copic makers...I had to take a close up because I was super excited that my blending technique is getting much better. It has taken some time to get used to these markers, but now I LOVE THEM! I'm still having some trouble finding the RIGHT ink to prevent smearing. I've tried them all, Black Stazon (not too bad, if I let the images dry overnight!!!), True Black from Papertrey Ink (I had the worst smearing with this one...maybe because I used the glossy white cs from SU!??), so for those of you who "copic" I'd love some advice on what I'm doing wrong with these inks??
Here I added a quick monogram with my PTI-Ambassador Alpha set. I trimmed a few short pieces of ribbon and double-knotted so they stay on tight!

I squeezed in a mini can of coke and hotel sized rum. It is a very tight fit, as you can see in the photo above, it did distort my mailbox a little bit but I just shoved it all in and shut the lid really quick...lol I did drop this off at her work, hopefully the stress dies down and doesn't cause her to "drink on the job!"...lol Fun, Fun, Fun!

Wednesday, April 1, 2009

Sweet Little Packages...

I thought I'd share a few more ideas for fundraising items I've been making for Relay for Life! These were made during my blog hiatus last month and I made them by the basket-full. My hands were pretty sore from folding all those chocolate boxes, so I thought I could make something just as nice, that didn't consume nearly as much time...although, I did use my nesty dies again, so I'm really sure I saved much time...lol There are 50 in the basket:) I kept them simple since I needed to make such a large quantity. The tags are printed off the computer and I stamped the chocolates with my PTI ambassador monogram set as well as SU! polka dot bg. Remember those butterflies I was telling you about from my new Verve Set? I wanted to try a new spin on those nifty post-it note pads I love to make. Plus is saves me on a lot of ribbon! Well, instead of using a flower on top, I decided to put the butterfly on top of the stem! I stamped the image twice. The top butterfly is cut out for a 3-D effect and I put some rhinestones down the spine.
Close up!Another color variation.And one more!To adhere the post-it pad down to the cs just use two strips of sticky tape on the back of pad, line up, and pressure to the back for a nice hold. Don't forget, if your giving these as a gift, let the recipient know they are REFILLABLE! All you have to do is add more sticky tape to a new pad and you'll be good to go!

Friday, March 27, 2009

A Tisket, A Tasket...See My Little Basket?

Don't adjust your screens, yes I have made this one before, but I added a chocolate box to this nifty little purse basket. This was a fundraiser item for Relay for Life for another team member. We decided to leave a little room on the left for a mystery gift card! These notepads have been a hit and I'm thrilled all the money is going to a wonderful cause. It's always fun to dress up the chocolate nugget boxes! I started keeping the chocolates in bulk so they are always on hand for quick gifts. My hubby asked me the other day, "hey honey, did you know there is a TON of chocolate candies in the pantry?" Yes dear, they WILL be used, plus they were on sale so I loaded up! I used SU! paper for the box and my PTI polka dot basic set as well as their monogrammed alphabet. There is a purse (if the donations are bulky, it becomes a basket...lol) auction each month at the Team Captains meetings and it's up to me to fill the goody bags. The catch for the bidders is that they have no idea what the contents are!!!! The last few auctions have sold for 250.00! I used my Cricut to cut out the "hope" and added some stickles. The shamrock is just a foam shape I picked up at Micheal's. Mmmmm, more chocolate! Remember, I loaded up?!!! I needed a way to attach that beautiful bracelet, so I used some curly ribbon and tied it around a bottle of apple cider! It was so pretty that I didn't want it to slip inside the basket, never to be found again.
I hope you all have a wonderful weekend! It's supposed to be near 70 here!

Wednesday, March 25, 2009

Simple Thank-you's and MORE Chocolate boxes...

This is an order I put together for a local realtor. I tried to keep the design fairly simple because of the time line and quantity. Of course, you know when your using your nesty dies and wizard die cutting machine, these are cranked my hand so it can be time consuming, but the end result is so nice...that's why I keep relenting and keep using them! The colors I used were SU! Pixie Pink, Green Galore, & Real Red. I printed the name of each recipient on the card per request.I can't remember which stamp sets I used from PTI, however, it was two different sets and look how well these little stars fit together?? This totally was not intentional, but I tried and went with it!
And here is ALL 50 boxes!!!! Yes, I scored and folded all 50 of these by hand....hence my last post on the swollen fingers...lol Once I have all my orders together, I package them with clear envies (purchased thru Clearbags.com) which makes it easier in transport. This was a local delivery, but I didn't want anything getting pulled off by stacking them too close together. Clearbags has several (maybe several hundred!!!) different sizes to choose from. The bags I used here were actually cut in half so I had double the supplies:)

It's yucky weather here in NC today. Hoping for the sun to poke thru at some point! I'm off to finish up some design team projects for Glue-Art & Paper Studio....can we say wood and Amy Butler Fabric??????!!!!! YUM-O!

Monday, March 23, 2009

Well rested and Peaceful...

It's about time I update the ol' blog eh? I missed blogging, but have been busy for all the right reasons! Sooo, I will update this post with whats been going on...mostly crafting related as I have been creating my little fingers to the bone. I had to take a break because I was waking up with my fingers swollen and tingling! EEEEK! Back in February I decided to host a craft day for my girlfriends and my sister was able to join us! Unfortunately, she was busy chasing a sick baby while we were crafting so I missed her in the pics, but I do have some work of hers to share! I kept the invite simple and printed them straight from the pc. The flower is punched with my Martha Stewart flower punch. I added some leaves and a button to the top. All in favor of the Target $ Spot???!! I picked up these pink pails for some door prizes as well as used a couple of them for Gracie's teacher's for Valentine's Day. Inside the pails is a cellophane bag that I filled with chocolates, tied with ribbon, and then added the tag. These are my new Verve Stamps I played with...they are a little addicting I might add. I love to double layer look here with the flowers...this set comes with some fun butterflies as well! The butterflies were used on another project I will share in the next week or so!
Close up! I decided the tag looked a little "too plain" so I sewed the trim around the edge! Looks a little vintage, right? Or at least that's the "look" I was going for! Here are the gals! That's me in the back with the green shirt on! We did two projects: mailboxes & stationary sets! I made sure all the pieces were cut ahead of time and put all the supplies in the lunch sacks. This saved a lot of time and allowed me to help out with the stamping. Acrylic stamps can be quite intimidating for first-timers. Here is a mailbox my sister, Christie, did! At the workshop we had left the front lid plain, but I think she did a wonderful job adding the quote on front.February also made room for the birthday girl! My oldest Gracie, turned 5 on the 18th. This was not only a big deal for her, but for my Hubby and I as well. This is the first birthday for both of my children that was celebrated in OUR home. In all the years past, we have been in V.A. or G.A. to ring in their birthdays.
Addison, Gracie, and Aidan (my Nephew...look at those yummy cheeks!!!)
My attempts at a "princess" cake! In my case I call it my "terrifically-tacky" attempt, but at 5 it meant the world to Grace, and that's all that mattered to me!
I saved the BEST for last, not for the situtation, but for the person! My last post left off with news no one in my family was prepared for. My Grandfather was diagnosed with lung cancer in early February and passed away March 7th. It has been incredibly hard for everyone in the family, but with each passing day, we know he is in a better place. He meant the world to us all and I'm grateful for the times we did get to spend together. Even at the age of 92, he was still very sharp and witty. He was a gentle giant with a heart of gold and will be greatly missed! We Love You!