STAMPING SUPPLIES FOR SALE

Showing posts with label Gift Card Holders. Show all posts

Thursday, October 6, 2011

SU! Swap Stockings Galore...

Before I get started on today's post, I'd just like to say a little 'thank you' for your comments on the sketchbook post. The sketchbook really is a great tool when your sitting there 'stumped', got all your supplies out, and no where to go! I did in fact make myself one as well, but she is a little bland...just the plain ol' clear binder. When I have some free time, I think I will dress her up a bit!

Now, on to today's post! It might be a little premature to be posting Christmas stuff here(because I still have some cute Halloween ideas yet to share!), but I really was super excited to try out the new SU! stocking die! The size of the stocking is larger than I thought and I really like that. There are several dies I have by SU! and I will be honest, they are much smaller in person than when I see them on blogs etc. The wonderful thing about this larger stocking die is that you can make banners with it too! This stocking collection is for a SU! Swap coming up this weekend. I immediately thought of a gift card option and knew I had to try it! To create the stockings, you will need to cut out 2 stockings...1 in patterned paper for the front, 1 for the kraft paper in the back. Those 2 pieces together will create your pocket to hold the gift card. The Window Punch from SU! makes the perfect slot to slide your gc inside(I used my library card to ensure the pocket was just the right size!) Love, love, love these textured paper leaves! These leaves come in a large pack loaded with leaves of different sizes at Mike's. The red Dew Drops(Poinsettia Jar) were glued on with SU! Crystal Effects. Patterned paper is from the paper pack O' Christmas Tree. After I assembled the stockings, I wanted to add just a bit more glitter with my Stickles Vintage Copper. The glitter lines really POP with the bright Christmas colors.

Monday, June 13, 2011

Girly Graduate...

Happy Monday! We are officially on Summer vacation and you would totally know it with yet another sunburn! I was pretty good about getting several layers on, but fair skin+sun+beach=glutton for punishment! Luckily this weeks is not as bad as the previous...next time I will just stay fully clothed WITH gloves...lol!

Anyhoo, I've got a quick card post to share with you today! I picked up For The Graduate stamp set for this card and made a girly spin on the colors and layout. If you have been following me via facebook, you know I have been linking fun tutorials about seam binding etc. Well, I bought myself a roll and these little rosettes were my first trial run with dyeing and twisting. I followed a simple and easy tutorial by Debbie and used a light pink copic refill. I'm not sure if there are other re-inkers you can use. I did try another strip with SU! re-inkers and it didn't dry as quickly and the crinkle is a little softer. With the copic re-inker, it dried fast because they are alcohol based and I was able to use this seam binding within 5 minutes of dyeing. I used a large scallop die on the inside of my card to create a pocket for the money. A nice and simple gift for any grad on their way to college!

Saturday, June 11, 2011

Road Trippin' Snack Basket...

A very special gift, for a really awesome family! There isn't much that is predictable in life, almost NEVER in the military lifestyle. It is PCS season once again(moving time!) and although we have not had to do this since we left NYC, we said goodbye this morning to great friends who became our family away from family. I suppose after we finally bought our own home, we became comfortable with our surroundings and were in denial that our neighbors would always be the same great folks we met nearly 3 years ago. I'm thankful for the M family...lots of laughs, kindness, and most importantly...a lifelong friendship!Since their trip will take them a week or so to reach their destination, I wanted to put together a snack basket FILLED with lots of goodies. I took into consideration that it could not be made too large, but needed to hold as much as I could get stuffed in there! I knew I couldn't go wrong with this lime green basket that I picked up at Mike's. A neat idea I came up with for gift card holders. I wanted each card to represent the children's personalities! These are very simple to make up. I think I may do a tutorial on the next round I make! Wouldn't this pattern be cute for Christmas gc's to hang on the tree??!On the reverse side, I just flipped up the bottom half and taped down the sides, and slid in the gift cards. There was plenty of room to write a quick message of thanks on the back. I figured with all the stops they had to make along the way, gift cards were a nice and compact gift when the car is FULL of luggage and kids!

Thursday, June 9, 2011

Monogrammed Teacher Gifts...

School's out for Summmmmmmmmmer!! Our last day is tomorrow here in NC and myself and the kids can hardly wait! We have several family trips planned this Summer and a wedding so it will be packed. I wanted a fun way to say thank you to the teachers...besides the candy and bath stuff that teachers are probably overloaded with...am I right??? And even though I said I'm no fan of decorating with apples, I hope I have redeemed myself here by throwing in a Staples gc...something they can REALLY use! There are many ideas with clear cups and these drink mix combos...I first saw these on my crafty friend, LYNN's, blog! You can also check out Jen's HERE, and Susan's HERE...love their use of the ice cubes...ADORABLE!I trekked to Wal-Mart and Target in search of plastic cups. Then I remembered my sweet friend Stephanie(Sweet Southern Designs) does monogrammed cups. I have bought a few of these as gifts in the past, and I'm amazed for being clear, they really do keep your drink COLD for several hours! SCORE! I simply filled them with Lipton Tea and several types of Crystal Light. To keep the packets from moving around, I added some shredded kraft paper in the middle.Simple Apple gift card holder. I like this new shape and it fits the card very snug so it doesn't slip out. Apple set is from PTI.

And of course, she really should have something 'stronger' in her glass...Ms. Denise, the bus driver ;) It's been a great school year! I always get a little anxious about the year ending because it means my babies are getting older. Both of my girls will be in school full time this Fall and I'm just not sure I'm ready for that ; (.

Tuesday, March 29, 2011

For the DUDE'S...

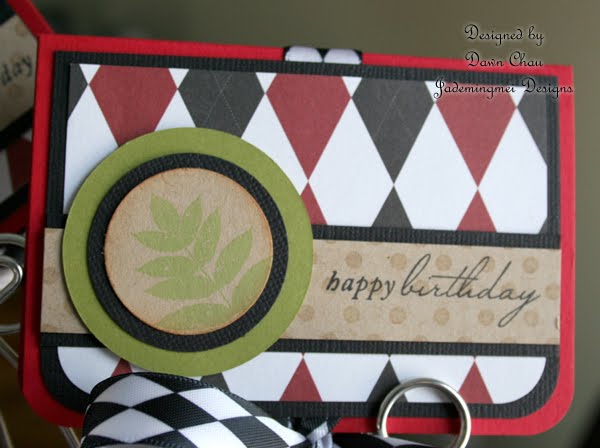
If I make some for the ladies, I've got to make some for the men as well! For all these cards I used MASCULINE MOTIFS from PTI. The paper is current from the Recollections collection....whoa, say that 10 times! I also picked up the ribbon at Mike's!


This show I'm prepared as these were a BIG seller over the holidays. I made several different themes and in my next post, I will share some baby gc holders that I also made into coordinating cards!

Monday, March 28, 2011

Gift Card Bouquet...

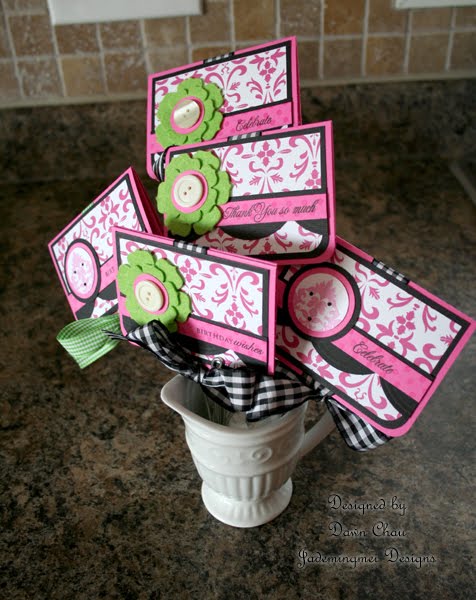
Happy Monday ya'll...in my finest Oklahoma twang! I'm feverishly getting things prepped and finished for the Martson Craft Show this weekend, April 2nd and 3rd!! I've still got some more space to kill on my pegboards, but it's finally getting to where I'm not in a mad dash like I was last week. In the meantime, this week I will be featuring gc holders for ladies and gents! HERE are some other fun holders I've made. The damask paper is from Michael's Recollection line. This paper is current and it comes in lots of different patterns such as polka dots, stripes, etc. It is thinner than normal cs, but when layering, I prefer it not be as thick as the other cs I'm using. This helps cut down on bulk ;) Sentiments and damask stamp are from PTI. I added some shimmery black rhinestones to the center.

Tuesday, January 5, 2010

Happy New Year!

I hope your New Year's if off to a wonderful start! I had such a great time with my family here for the holidays...certainly went by too fast! Our New Year's was pretty quiet and my hubby and I didn't even make it to midnight:( That is a definite sign that we are getting older!

Needless to say, with the break in blogging I was able to get several new projects created. The past year has brought many folks in to my life that truly made a difference in one way or another. To show my gratitude I'm making up several notebooks as a token of thanks.I will have other patterned notebooks to show, but I started with my these little hot pink/black color combos. I'm back to using those snazzy coffee cups (MFT) again! On the hot pink cs, I decided I wanted a subtle bg image. This particular bg image is from the PTI-bg basics: text style II. It not only gave the subtle effect I was looking for, it with the dew drop ink, it also gave a nice shimmer! Coffee cups are filled to the brim with SU! crystal effects
for a 3-D effect. Fun little gift card holders. I used the same bg text and dew drop ink here, but on a pastel pink cs. This is probably the first project in which I used the same stamp brand, but several different sets. All stamps are from PTI and include: star prints, bg basic: text style II, polka dot basics. I hand cut the polka dotted star, then trimmed a little chocolate chip for an additional matte. Something tells me I really need to invest in those star punches because I plan on making many more of these:).I was trying to "detail" the shimmer of the dew drop ink...my photography skills failed me...again...lol

Monday, November 16, 2009

Gift Card Holders...

I thoroughly enjoyed the class I taught in my home yesterday. It's so nice to get together with great girlfriends to chat and craft. I love them dearly! This was the third class I've taught this year and I have to say it was by far the best. I prepared kits already pre-cut and ready to assemble which made it much easier for all of us. We chose 2 projects: holiday planners and gift card holders. Both were fitting for the season.Takes me a couple weeks to get all the supplies together so I try to find something that is appealing and easy for everyone to put together. I used this template from one of my first SU! classes several years ago. I don't have a photo link, but it's super easy. Take a piece of 8.5x11 cs and cut in half on the 8.5 side. Scor at 3, 5.5, and 8 inches and fold. I used my SU! slot punch twice on the inside and then my SU! circle punch in the middle of the 2 slot punches. Once you tape the underside, your card fits snug and secure. These sold out at the class, but I loooove the glitter on the paper. There was a scrap booking store going out of business last week so I snagged some killer deals on paper. This paper is from K & Co.
"Wish Big" is from PTI-star prints as well as the pink star underneath.Did you see the new widget??? It's my new Etsy logo:) These were the first thing I put up tonight and they sold quick! It must have been the "cheery-cherries" on my new DCWV-Berry Street Farmer's Market paper....sooo yummy! There is certainly a vintage feel to this paper so I had to try out the ragged ribbon on a few...makes me want to go berry picking?I absolutely adore the texture on this paper. The texture itself really "pops" to the eye, however to the touch, it's very smooth.Whew! You made it all the way to end...or at least I "think" you did! This Etsy venture is very new to me, I'm destined to have a few gliches along the way! If your interested in purchasing my creations and have questions about how it works on Etsy, please feel free to contact me...we'll learn together! I'm going to test the waters on how often I update the shop...shooting for weekly uploads, but more likely to be 2-3 times per month. Thank you for all the wonderful comments and emails on this new venture.